Using a CNC router for woodworking can greatly improve the efficiency and precision of your woodworking projects. Here are the basic steps to follow:
Choose and prepare your design: The first step is to create or choose a design for your project. You can use software like AutoCAD, SketchUp, or VCarve to create a digital design that the CNC router can read. Make sure your design is compatible with your CNC router software and format.
Select your wood: Choose the type of wood you want to use and prepare it by cutting it to the size you need. Make sure the wood is flat and smooth before placing it on the CNC router.
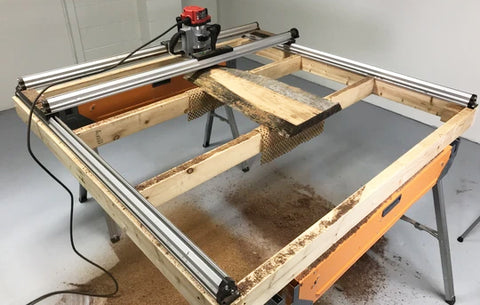
Secure the wood: Use clamps or vacuum tables to secure the wood to the CNC router bed. Make sure it is securely fastened and won’t move during the cutting process.
Load the design: Load the digital design into the CNC router software and make any necessary adjustments. Set the cutting depth, speed, and other parameters according to the type of wood and project you’re working on.
Test run: Run a test program to make sure everything is set up correctly and the machine is cutting the wood correctly. Make any necessary adjustments before starting your actual project.
Start the cutting process: Once you’re satisfied with the test run, start the cutting process. Monitor the machine during the cutting process to ensure everything is running smoothly.
Sand and finish: After the machine has finished cutting, remove the wood and sand it down to remove any rough edges. Apply any necessary finishes or stains to complete the project.
Using a CNC router for woodworking can be a valuable tool in your woodworking arsenal. With a little practice, you can create intricate designs and precise cuts that would be difficult to achieve by hand.